If you read my last blog post you’ll know that this is Part 2. If you missed Part 1, you won’t want to miss it- click here to get the scoop. Now that we’re all on the same page, here are the before & after’s from the basement unit of our South Jordan Flip House we completed in April.
This basement unit was hands down the hardest part of this renovation. It was a piece of work! The good thing was that it already had a separate entrance for an ADU (Accessory Dwelling Unit) which are huge here in Utah. It’s a way that the home owner can make extra income or offset their mortgage by renting out their ADU without having to share any living spaces with them, which automatically adds value to the home, so that was a bonus!
The downside to that was that the current owners never got permits to build the basement, let alone rent it out, so we had to go through the whole process to make sure it was done legally, which proved to be a pain in the butt. Ha! And not to mention, this basement needed the most work out of the whole house. We had to tear down the existing drop down ceiling, raise the ceiling about 6 inches, and then drywall the entire ceiling. We also had to add all new recessed lighting, tear down all the paneling on the walls, re-drywall and we had to rent a jackhammer just to rip all the tile out, then level the floor and finally lay new LVP floors. And here she is, in all her glory!
Basement Kitchen
BEFORE
AFTER
This kitchen was the weirdest layout and only had a microwave and a sink in it and the craziest part is that people were living here using it. I don’t even know how you can get away with renting out a long term rental without a fully equipped kitchen, but to each their own! Right in the middle of the kitchen was this random bar area, which was the biggest waste of space and just made this feel so cramped and took away lots of the usable kitchen space for real appliances so we tore it down along with the wood paneling on the walls and created a basic kitchen down here for a rental fully equipped with a microwave, oven, dishwasher and sink and brand new quartz countertops.
We also created a pantry closet for them where the fridge was sitting in the before picture and left a space on the very left end of the kitchen for a fridge.
The other part of this space that makes the biggest difference is the door on the very right, which is their basement entry door for renters. You can see in the “Before” photo that the door scraped the ceiling every time it opened, so we raised the ceiling about 6″ so that would no longer be an issue and a bonus of taller people not hitting their heads! You can see in the “After” picture the drop down in the very top middle of the picture is where the original ceiling used to be, but to the left and right of that it goes up about 6″.
PAINT SOURCES
Walls, Ceilings & Baseboards: BM Simply White
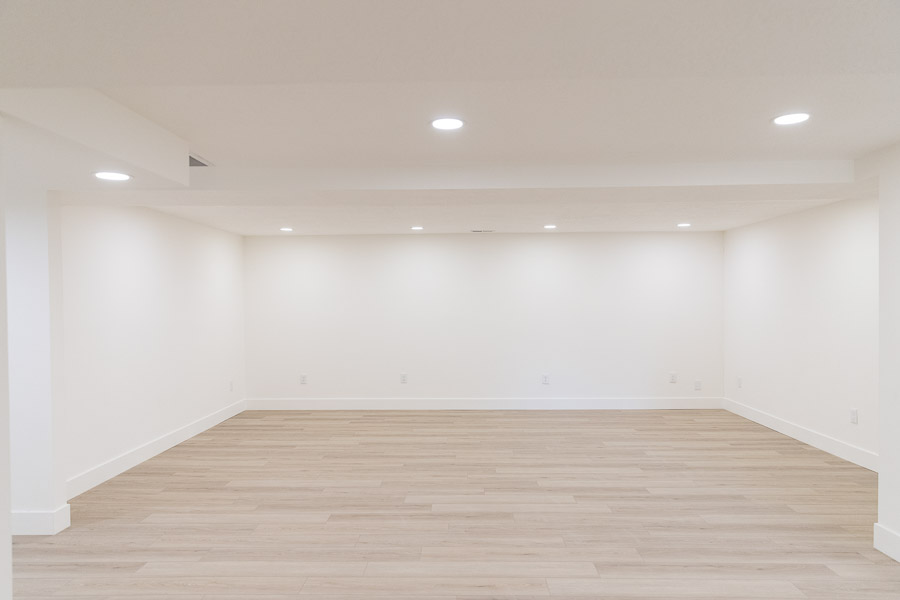
Basement Living Room
BEFORE
AFTER
One of my biggest regrets of this flip house was my before pictures. I was rushing and trying to do a million different things and ended up getting almost all of my before pictures vertically, which works great for Instagram, but is so hard to see the full picture for any other platform, and just for my viewing pleasure. Lesson learned! You bet I’ll be getting horizontal before photos of the next flip house! But this area is honestly such a crazy transformation even just by taking out all of that wall paneling. It makes such a difference! Now it’s a clean slate for the new owner to be able to easily rent this place out.
PAINT SOURCES
Walls, Ceilings & Baseboards: BM Simply White
Basement Dining Room/Living Room
BEFORE
AFTER
This entire house was full of stuff everywhere and they had cabinets upon cabinets for storage, which made everything feel so small and cramped, so we added an actual pantry closet in the kitchen area and took away all of these extra cabinets and brought them into the garage to add some storage there and now it’s such a bright and open space and I feel like I can breathe again! Ha!
PAINT SOURCES
Walls, Ceilings & Baseboards: BM Simply White
Basement Hallway
BEFORE
AFTER
Another angle just showing how much stuff they had in here and how dark and dingy it was before. Now it is just so bright and refreshing! And obviously, the designer in me is dying to get my hands on it to add some color and warmth and textiles in here, but we didn’t have the budget to stage both levels so we opted to leave this empty to showcase the ADU.
PAINT SOURCES
Walls, Ceilings & Baseboards: BM Simply White
Basement Bath
BEFORE
AFTER
This basement bath was honestly just shocking for me. The fact that they had a pedestal sink in here when there was room for a 48″ vanity blows my mind. Adding in a bigger vanity actually made this space feel bigger!
PAINT SOURCES
Walls, Ceilings & Baseboards: BM Simply White
Basement Bedroom #1
BEFORE
AFTER
BEFORE
AFTER
BEFORE
AFTER
This bedroom needed some major TLC. It had a drop ceiling, no window and an AC unit stuffed in where the window was. We ended up cutting out the windows to be bigger and digging out the window wells to accommodate it and it made such a huge difference in not making it feel like a basement. I mean just look at all of that light it’s letting in! We ended up replacing the drop ceiling with a shiplap drop ceiling and painting the existing wood paneling white and now it feels like the charming bedroom it was meant to be!
PAINT SOURCES
Walls, Ceilings & Baseboards: BM Simply White
Basement Bedroom #2
BEFORE
AFTER
We ended up cutting out the windows in this room as well to be bigger. Because they did not have permits to finish this basement and we had to obtain permits, we had to make these windows big enough to be able to be climbed out of in an emergency since they are bedrooms, which was a major expense we were not planning for, but hey, at least it made it look a million times better, right?
PAINT SOURCES
Walls, Ceilings & Baseboards: BM Simply White
Outdoor Separate Entrance
BEFORE
AFTER
Where you see the long black railings in the after shot is the separate entrance for your renters. Those stairs lead down to the basement exterior door and is a private entrance your renters can use. it’s hard to tell, and once again I’m kicking myself for not getting better before photos, but you can see a glimpse of the white Wagon Wheel railings that were there in the “Before” photo, and not to mention all the junk that was just sitting outside on the patio.
PAINT SOURCES
Exterior Brick: BM White Dove
Exterior Door: BM Revere Pewter
Exterior Aerial View
This shot will never stop blowing my mind. You can really see just how much junk was on the property before and how clean it is now. Quinn had multiple neighbors stop by to thank him for cleaning the place up.
The Backyard
I never could get really great before or after photos of the backyard because there was so much junk you couldn’t see the house before, even from the very back of the yard, but now there’s nothing back there that you can’t really capture the afters from the before shots I got so I’ve decided to just add a bunch of before shots from various angles from the yard before above and then found the closest before shot I could get showing the house. Just believe me when I say there was junk GALORE back here. Everything from boats, RV’s, Airstreams, trailers, toilets, vanities, old couches, desks, you name it. They had it back here, along with a really trashed barn that was completely unsalvageable. It took us 21 dumpsters to clear this entire house of all the junk and the backyard alone took about 11.
BEFORE
AFTER
And that’s a wrap of our South Jordan Hoarder House Fixer Upper! It went under contract within 4 days of being on the market and we closed on it just shy of a month after listing it. I still can’t believe we are done and that the new owners are already enjoying a house that we poured our heart into. It was a wild ride, but I’m already ready for another!
Follow along on Instagram to see what fixer upper we do next! Thanks for stopping by and supporting this small business of mine. It truly means the world. I hope you’ll continue to follow along as we renovate the rest of our home and others in the coming years.